Join

Join
Join My Team: Demonstrators and Discount Shoppers Welcome

PLEASE LEAVE YOUR EMAIL FOR NOTIFICATION OF MY CLASSES AND TO RECEIVE ALL MY FREE TUTORIALS

Please Subscribe for Current Posts and Newsletters

* indicates required

Saturday, June 27, 2020

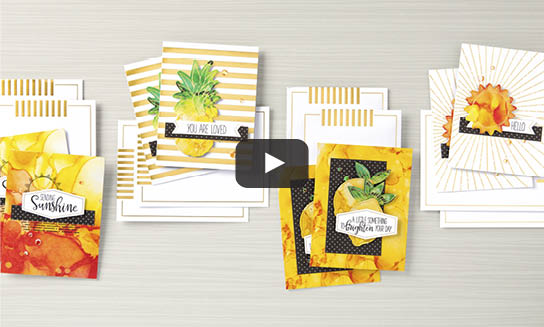
July 2020 Paper Pumpkin

July Summer Nights Paper Pumpkin

Celebrate the magic of summer nights with the Summer Nights Paper Pumpkin Kit! In this exclusive fun-filled kit, you’ll unbox enough supplies to create nine postcard-style cards, coordinating envelopes, and die-cut tealight bags. What’s even more spectacular about July’s kit is the add-on you can purchase along with it! The Summer Nights Add-On includes 24 card bases and envelopes in coordinating Summer Nights designs.Ordering ends July 10th, 2020.  Click here to order

Wednesday, June 24, 2020

All Inclusive Kits


For some looking at our annual catalog can be overwhelming, especially if you are just starting to paper craft.  No problem,Stampin' Up has all inclusive kits with everything you need to make beautiful cards.  The Looking Up all-inclusive card kit includes everything you need to make 15 of these all occasion cards.  All you need is a scissors, they've even included the envelopes for you.

If you need a catalog or more information please feel free to contact me.

Tuesday, June 23, 2020

PAPER PUMPKIN

New to card making?  Do you like surprises in the mail?  Maybe a girls night together once a month with a glass of wine and a craft??  Why not try joining Stampin' Up's Paper Pumpkin

June 2020 Paper Pumpkin
0620_PP_PREVIOUS_KITS


For more information and to subscribe click here:


Sunday, June 21, 2020


I bet there aren't many of you that have heard of Guckenheimer??  Here in Wisconsin it's a cheap Whiskey and the men in my family have it in all of their shops.  When Stampin' Up came out with the new Whiskey Business stamp set I knew I would get lots of use out of it!!  A little shimmery crystal effects on the ice cubes and the card looks good enough to take a sip!!

Ingredients:
Early Espresso card base
In colors 2020 DSP Cinnamon Cider 4 x 5 1/4"
3" x 3 1/2" Whisper White
Scrap of Early Espresso and Whisper White
Everyday Label Punch
1 1/2" Circle Punch or Die
Early Espresso Ink
Stampin' Blends:
    Cinnamon Cider
    Pool Party
    So Saffron
    Smoky Slate
    Color Lifter
Faux Suede Trim
Shimmery Crystal Effects


Directions:
    1)  Stamp sentiment on scrap of Whisper White and circle punch or die cut
    2)  Punch with Everyday Label the scrap of Early Espresso and attach sentiment to label
    3)  Stamp bottle and right glass on white layer, stamp left glass on white scrap
    4)  Color images as shown, I used the color lifter for the lighter areas of the brown.
    5)  Fussy cut glass from white scrap and attach with dimensionals
    6)  Wrap ribbon around DSP
    7)  Attach white layer to bottom/left side of DSP and attach both layers to card base
    8)  Attach sentiment with dimensionals
    9)  Apply Crystal Effects to the top of the ice cubes

Racing Friends (Geared up Garage)


When my son was 8 he learned how to race on an asphalt track in a bandolero car.  These cars are ¼ size of a Nascar and can go up to 90 mph.  He raced all over Wisconsin and Minnesota.  His biggest race was at the Kentucky Speedway where Nascar holds their races and he finished first!!  It was a very exciting time.  We still have many friends who race and I needed a card to wish them good luck and the Geared up Garage Stamps and Garage Gears dies were the perfect set to create this card.


Ingredients:

Geared Up Garage Stamp set

Garage Gears Dies

Hammered Metal embossing folder

Basic Gray card base

5 ¼” x 4” Night of Navy

3/8” x 2” Real Red

Scraps of:

          Silver

          Real Read

          Balmy Blue

          Whisper White

Basic Gray ink pad


Directions:

1)    Emboss night of navy piece with embossing folder

2)    Stamp sentiment on white scrap and fussy cut

3)    Flag ends of real red strip and attach to back of sentiment

4)    Die cut large cluster of gears out of silver foil and several small gears out of scrap pieces.

5)    Attach large cluster of gears with dimensionals and glue remain gears to night of navy layer.

6)    Attach navy layer to card base.

7)    Attach sentiment with demensionals.


Crystal Effects Prized Peony


Crystal Effects Prized Peony

I always remember to bring out my Crystal Effects when making holiday cards but somehow it gets moved to the back of the draw for the rest of the year.  The picture doesn’t seem to do justice to the peony but covering it with a layer of Crystal Effects really makes the flower POP!!


Ingredients:

Blushing Bride Card Base

4x5 ¼ Basic Gray

¼” Shimmer Gray Granite Ribbon

Best Plaid Builder Die in Whisper White

Prized Peony Bundle

Stampin’ Blends Light and Dark:

          Blushing Bride

          Granny Apple Green

Basic Gray Ink Pad

Everyday Label Punch

Timeless Label Punch

Adhesive

Stampin’ Dinensionals

Shimmery Crystal Effects


Directions:

For Sentiment:     

1)    Stamp sentiment with basic gray ink on whisper white and punch with Everyday Label.

2)   Punch on scrap of blushing bride with timeless label and cut label in half.

3)   Adhere blushing bride halves to the back of sentiment label so that each half is sticking beyond the sides of the label.

4)   Add dimensionals to the back and set aside until ready to adhere to card

Card Base:

1)    Cut base 5 ½” x 8 ½” scoring long side at 4 ¼” fold at score line and burnish with bone folder

2)   Die cut thin Plaid Die on Whisper White and attach to Basic Gray.  This layer can then be added to your card base

3)   Stamp large peony on whisper white with basic gray ink. 

4)   Color with blends

5)   Die cut colored peony

6)   Attach to card base with dimensionals

7)   Attach sentiment

8)   Attach bow

9)   Apply Shimmery Crystal effects to peonies.  You can use a small paint brush to spread the crystal effects evenly but be sure to use a brush that you don’t care if you can’t get it clean when done.